Consumer flight sims are increasing in popularity nowadays. From aviation Geeks to hobbyists and innovators, more and more people are getting into building flight simulators. One such group is the EAA 485 – a group of aviation enthusiasts in Florida who come together often to share their love of flying.
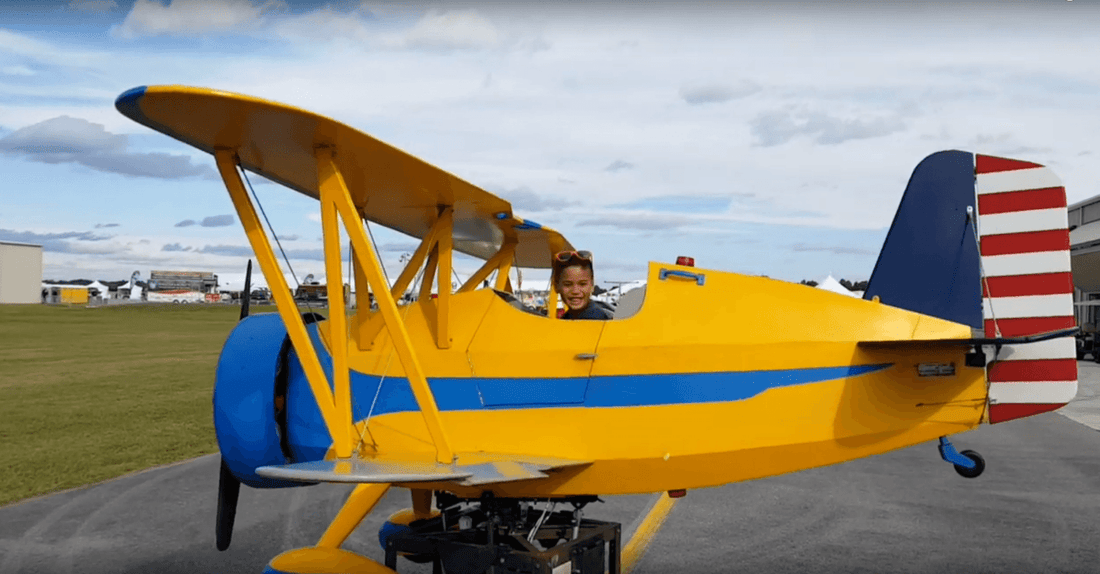
John McKiernan, President of EAA 485, reached out to us about the group’s most recent rebuild of a child biplane simulator known as Rusty. “We bought Rusty as a working 3 axis simulator from a sister chapter in Wetumpka, AL. It was originally built by hand using what looked like early 1960s technology and it had 24vdc motors with belt-driven jack screws, 6 limit switches, 6 DPDT relays, and an unbelievable 18 fuses,” said Mc Kiernan.
Rebuilding the Biplane
It wasn’t an easy process rebuilding the Biplane, “It took a full weekend just to trace the wiring through clever homemade switches. It was a solid wood structure with painted on flight controls. We wanted them to move so we cut ailerons, elevators, and a rudder and with the use of push/pull cables and control rods, we had moving flight controls. Unfortunately, it was blowing fuses and most of the electrical parts needed replacing. It was an electrical nightmare and we wanted to simplify and modernize it,” he adds.
How were the PA actuators used in the Biplane?
The Simulator needed a 4” throw in the roll and pitch axis, and since the yaw axis was on a turntable, moving the attached point could increase or decrease the yaw movement. Having worked with our actuator products several years ago, McKiernan found the PA-03 24vdc, 200 lb actuator online with a 4” throw. “It took less than a day to dial it in and have the yaw axis working. I then purchased 3 more identical actuators to give us a spare. To make the roll and pitch work, it was necessary to machine 4 aluminum blocks to allow a Heim bearing to be installed. The Heim's joints were necessary to take some axial movement in the roll and pitch actuation. These were done by hand and seemed to work just fine. A new fuse panel was later made using normal spade fuses one for each actuator, Hobbs meter, and cockpit. The cockpit has real aircraft gages and a very clever radial engine sound controlled via a throttle. It uses radio control servo testers hooked to a module and a small center speaker behind the instrument panel. It even had a realistic machine gun sound when a button’s pressed,” explains McKiernan.
The Final stage
The final piece of the puzzle was to activate the linear actuators (for aviation) via the stick and rudder pedals. The stick was gated allowing either roll or pitch at a time. However, the rudder pedals worked independently. McKiernan further explains, “The original switches used a spring roller that when the stick or pedals were in neutral was in a phenolic block and moving the stick, or rudder pedals moved it to an aluminum switch plate. I didn’t care for having the stick providing the electrical path although phenolic blocks did isolate the area to under the seat. These were attached to an aluminum plate inverted and adapted each over the existing lower original switch structure.”
The ball rests in the middle position of the switch at neutral and with a stick or pedal movement moves the roller and depresses the switch. The roll system originally round took a bit more tweaking since the actual block had to be sliced to adapt the switch to the base.
Despite the few challenges, in the end, the installation turned out pretty clean and the simulator flew 36 kids on its first outing at the KJKA AOPA.
Mckiernan is indeed happy with the result, “Rusty is a big hit and we are constantly tweaking things.”
If you have built an application using our actuator products, we would love to know more. Give us a call or email us sales@progressiveautomations.com.