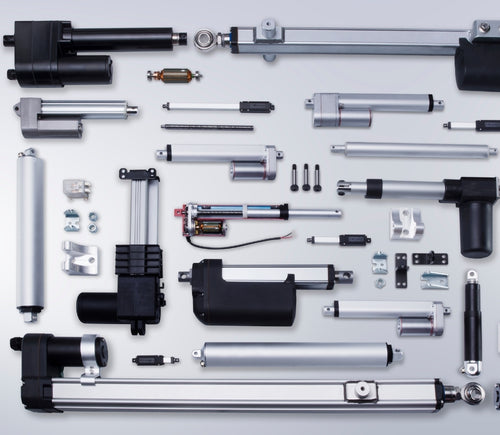
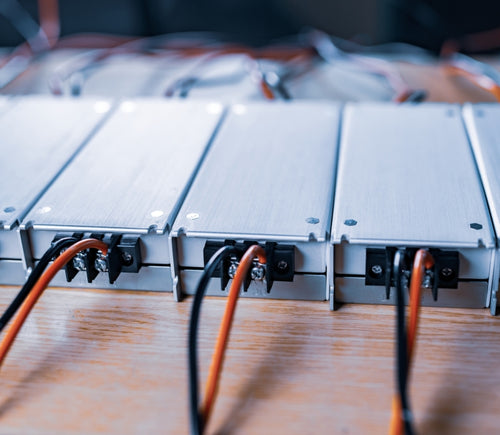
Retrofit Motorized Shades
Gas Springs
Monitoring the current of a linear actuator

Deze voorbeeldcode gebruikt MegaMoto Plus en een Arduino Uno om de stroom van een lineaire actuator te bewaken; vergelijkbare producten kunnen echter als vervanging worden gebruikt.

/*  Code om de stroomafname (in ampère) van de actuator te bewaken en de voeding uit te schakelen als deze
  boven een bepaalde waarde komt.

  Geschreven door Progressive Automations
  19 augustus 2015

  Hardware:
  - RobotPower MegaMoto-besturingsborden
  - Arduino Uno
  - 2 drukknoppen
 */

const int EnablePin = 8;
const int PWMPinA = 11;
const int PWMPinB = 3; // pinnen voor Megamoto

const int buttonLeft = 4;
const int buttonRight = 5;//knoppen om de motor te bewegen

const int CPin1 = A5;  // motor-terugkoppeling

int leftlatch = LOW;
int rightlatch = LOW;//motorvergrendelingen (gebruikt voor codelogica)

int hitLimits = 0;//begin bij 0
int hitLimitsmax = 10;//waarden om te bepalen of de eindposities zijn bereikt

long lastfeedbacktime = 0; // moet long zijn, anders treedt overflow op
int firstfeedbacktimedelay = 750; //eerste vertraging om de stroompiek te negeren
int feedbacktimedelay = 50; //vertraging tussen terugkoppelingscycli; hoe vaak je de motor wilt controleren
long currentTimefeedback = 0; // moet long zijn, anders treedt overflow op

int debounceTime = 300; //tijd voor het debouncen van knoppen; lagere waarden maken de knoppen gevoeliger
long lastButtonpress = 0; // timer voor debouncen
long currentTimedebounce = 0;

int CRaw = 0;      // invoerwaarde voor stroommetingen
int maxAmps = 0; // afschakelgrens 

bool dontExtend = false;
bool firstRun = true;
bool fullyRetracted = false;//programmalogica

void setup()
{
  Serial.begin(9600);
  pinMode(EnablePin, OUTPUT);
  pinMode(PWMPinA, OUTPUT);
  pinMode(PWMPinB, OUTPUT);//Motoruitgangen instellen
  pinMode(buttonLeft, INPUT);
  pinMode(buttonRight, INPUT);//knoppen
  
  digitalWrite(buttonLeft, HIGH);
  digitalWrite(buttonRight, HIGH);//interne pullups inschakelen
  pinMode(CPin1, INPUT);//terugkoppelingsinvoer instellen
  
  currentTimedebounce = millis();
  currentTimefeedback = 0;//Initiële tijden instellen

  maxAmps = 15;// MAXIMALE STROOM HIER INSTELLEN

}//einde setup

void loop()
{
  latchButtons();//knoppen controleren, kijken of we moeten bewegen

  moveMotor();//vergrendelingen controleren, motor in- of uitschuiven

}//einde main loop

void latchButtons()
{
  if (digitalRead(buttonLeft)==LOW)//links is vooruit
  {
    currentTimedebounce = millis() - lastButtonpress;// controleer tijd sinds laatste druk
    if (currentTimedebounce > debounceTime && dontExtend == false)//als dontExtend is geactiveerd, alle vooruit‑drukken negeren
    {
      leftlatch = !leftlatch;// als de motor draait, stoppen; als hij stilstaat, starten
      firstRun = true;// firstRun‑vlag zetten om stroompiek te negeren
      fullyRetracted = false; // zodra je vooruit beweegt, ben je niet volledig ingetrokken
      lastButtonpress = millis();//tijd van laatste knopdruk opslaan
      return;
    }//einde if
  }//einde btnLEFT

  if (digitalRead(buttonRight)==LOW)//rechts is achteruit
  {
    currentTimedebounce = millis() - lastButtonpress;// controleer tijd sinds laatste druk

    if (currentTimedebounce > debounceTime)
    {
      rightlatch = !rightlatch;// als de motor draait, stoppen; als hij stilstaat, starten
      firstRun = true;// firstRun‑vlag zetten om stroompiek te negeren
      lastButtonpress = millis();//tijd van laatste knopdruk opslaan
      return;    }//einde if
  }//einde btnRIGHT
}//einde latchButtons

void moveMotor()
{
  if (leftlatch == HIGH) motorForward(255); //snelheid = 0-255
  if (leftlatch == LOW) motorStop();
  if (rightlatch == HIGH) motorBack(255); //snelheid = 0-255
  if (rightlatch == LOW) motorStop();

}//einde moveMotor

void motorForward(int speeed)
{
  while (dontExtend == false && leftlatch == HIGH)
  {
    digitalWrite(EnablePin, HIGH);
    analogWrite(PWMPinA, speeed);
    analogWrite(PWMPinB, 0);//motor bewegen
    if (firstRun == true) delay(firstfeedbacktimedelay); // grotere vertraging om stroompiek te negeren
    else delay(feedbacktimedelay); //kleine vertraging om op snelheid te komen

    getFeedback();
    firstRun = false;
    
    latchButtons();//knoppen opnieuw controleren
  }//einde while

}//einde motorForward

void motorBack (int speeed)
{
  while (rightlatch == HIGH)
  {
    digitalWrite(EnablePin, HIGH);
    analogWrite(PWMPinA, 0);
    analogWrite(PWMPinB, speeed);//motor bewegen
    if (firstRun == true) delay(firstfeedbacktimedelay);// grotere vertraging om stroompiek te negeren
    else delay(feedbacktimedelay); //kleine vertraging om op snelheid te komen
    getFeedback();

    firstRun = false;
    
    latchButtons();//knoppen opnieuw controleren

  }//einde while

  dontExtend = false;//motor weer laten uitschuiven nadat hij is ingetrokken

}//einde motorBack

void motorStop()
{
  analogWrite(PWMPinA, 0);
  analogWrite(PWMPinB, 0);

  digitalWrite(EnablePin, LOW);
  firstRun = true;//wanneer de motor gestopt is, firstRun opnieuw inschakelen om opstartstroompieken op te vangen

}//einde stopMotor

void getFeedback()
{
  CRaw = analogRead(CPin1); // Stroom uitlezen

  if (CRaw == 0 && hitLimits < hitLimitsmax) hitLimits = hitLimits + 1;
  else hitLimits = 0; // controleren of de motor de eindposities heeft bereikt en de stroom is gestopt 

  if (hitLimits == hitLimitsmax && rightlatch == HIGH)
  {
    rightlatch = LOW; // motor stoppen
    fullyRetracted = true;
  }//einde if

  else if (hitLimits == hitLimitsmax && leftlatch == HIGH)
  {
    leftlatch = LOW;//motor stoppen
    hitLimits = 0;
  }//einde if

  if (CRaw > maxAmps)
  {
    dontExtend = true;
    leftlatch = LOW; // stoppen als terugkoppeling boven maximum is
  }//einde if

  lastfeedbacktime = millis();//vorige tijd voor ontvangst van terugkoppeling opslaan
}//einde getFeedback
Controlling multiple actuators with the multimoto Arduino shield
Wasp motor controller for linear actuator control
Using relays to control linear actuators
Controlling the timing of a single linear actuators motion
Continuously extend & retract a linear actuator with brushless DC motor
PA-12 micro servo actuator sample codes
Where can I find additional information on your products?

We have data sheets, user manuals, 3D models, wiring diagrams and more in our Resources and Learning Center sections.

How can I determine which progressive automations linear actuator is best suited for my application?
What is duty cycle and how is it calculated?
Can I use your actuators to replace the one that I already have?
What does stroke mean? How am I supposed to know which size to choose?
How do I know which force rating is right for my application?
Can I use my own power supply as a source for my actuators?
How can I control actuators to travel at the same time?
Why is my linear actuator making so much noise?
Can I customize a linear actuator to my specifications?
Can I synchronize my linear actuators?
Are linear actuator kits available?
Will temperature affect my linear actuator?
Can I implement one of your actuators into a third-party mechanism?
What is the pin out for my linear actuator?
Can I get 3D CAD models for my linear actuator?
What are the control box options for my actuator?
Can I use your control boxes with a third-party product?
Do you sell Wi-Fi control boxes?
Are all of your control boxes compatible with all of your linear actuators?
Can I use my own control box?
Do you have sample coding I could use?
I don’t have a power source – what can I do?
Can I use my own power supply?
Do you have 220 VAC power supplies available?
Can I control the lifting columns with a third-party controller?
Can I use two of the LG-11 lifting columns together?
What control box should I pair with my lifting columns?
Are your table/desk/TV lifts customizable?
What TV sizes can your TV lifts hold?
What is the weight capacity of your table/desk lifts?
Does my linear actuator come with mounting brackets?
Where can I find a step-by-step guide for my product?
I followed the wiring diagram but it’s not working – what should I do?
Flowchart for actuator selection
Can the FLTCON control boxes work with my actuators?
What is backdriving? -- What does dynamic and static load ratings mean? -- What is lateral loading?
How can I place an order?

Orders can be placed by one of the following ways:

Online: Use our online order process with options to pay by Credit Card or PayPal.

Phone: 1-800 – 676 – 6123

Email: sales@progressiveautomations.com

Do you offer quantity discounts?
What methods of payment do you accept?
What form of currency are your prices in?
How do I know if the product I want is in stock?
How much will shipping cost and what methods do you offer?

Progressive Automations’ shipping fees are calculated based on a variety of factors including but not limited to: location, quantities, and the total weight of your order. Smaller items are shipped via parcel while larger items and bulk orders are shipped via a freight carrier service. We always endeavor to provide competitive shipping prices for all our customers.

Shipping methods are available through online and phone orders. If you wish to receive an estimated shipping cost of your order, this can be done by reviewing your final shopping cart.

What freight companies do you use?
Will I be charged with any duty tax?
What is your return policy?
How long is delivery?
Do you offer free shipping?
Ik wil de langere zijde van mijn tafelblad links hebben. Kan het L-vormige sta-bureau-onderstel zowel links als rechts worden gemonteerd?

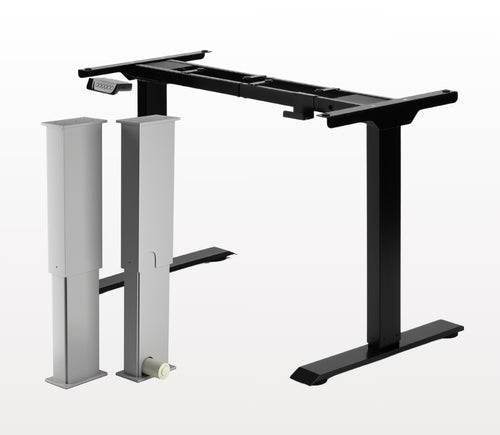
Ja, het L-vormige sta-bureau is flexibel qua oriëntatie en kan naar wens worden geïnstalleerd. Hier is een stapsgewijze handleiding die uitlegt hoe dit mogelijk is: FLT-05 Gebruikershandleiding

Hoe stel ik de maximale/minimale hoogte in voor mijn sta-bureau-onderstel(len)?

OPMERKING: De onderstaande stappen kunnen variëren afhankelijk van het model afstandsbediening dat u heeft. De volgende instructies zijn voor de standaard RT-11-afstandsbediening. Om de maximale hoogte voor uw onderstel in te stellen, ga naar de gewenste hoogte en volg de onderstaande stappen:

  1. Druk op M; [5 -] verschijnt op het display
  2. Druk op de UP-knop; [5 -] knippert
  3. Houd de M-knop ingedrukt totdat u [999] op het display ziet
  4. De maximale hoogte is nu ingesteld

Om de minimale hoogte voor uw onderstel in te stellen, ga naar de gewenste hoogte en volg de onderstaande stappen:

  1. Druk op M; [5 -] verschijnt op het display
  2. Druk op de DOWN-knop; [5 -] knippert
  3. Houd de M-knop ingedrukt totdat u [000] op het display ziet
  4. De minimale hoogte is nu ingesteld

Om de limieten te resetten, volgt u de onderstaande stappen:

  1. Druk op M; [5 -] verschijnt op het display en laat dan los
  2. Houd M ingedrukt totdat u [555] ziet
  3. De limieten zijn gereset
Ik moet de knoppen van de afstandsbediening ingedrukt houden om mijn vooraf ingestelde hoogte te bereiken. Kan dit ook met één druk?

OPMERKING: De onderstaande stappen kunnen variëren afhankelijk van het model afstandsbediening dat u heeft. De volgende instructies zijn voor de standaard RT-11-afstandsbediening.

Als u de knoppen van de afstandsbediening ingedrukt moet houden om uw vooraf ingestelde hoogte te bereiken, betekent dit dat uw besturingskast in de momentary-modus staat. Om uw afstandsbediening in de non-momentary-modus te zetten, volgt u de onderstaande stappen

  1. Zorg ervoor dat er niets onder uw bureau staat, aangezien we de resetprocedure moeten starten
  2. Houd de DOWN-knop ingedrukt totdat [ASr] op het display verschijnt
  3. Zodra [ASr] verschijnt, drukt u op [1] en houdt u deze ingedrukt; u kunt twee waarden zien:

    a. 10.1 = Non-momentary-modus
    b. 10.2 = Momentary-modus

  4. Voltooi de resetprocedure door de DOWN-knop ingedrukt te houden totdat uw sta-bureau iets zakt en weer omhooggaat.
Hoe wijzig ik de gevoeligheid van de botsingsdetectie?

Onze sta-bureaus hebben 3 instellingen voor botsingsdetectie, die u naar wens kunt instellen. Ga als volgt te werk:

  1. Zorg ervoor dat er niets onder uw bureau staat, aangezien we de resetprocedure moeten starten
  2. Houd de DOWN-knop ingedrukt totdat [ASr] op het display verschijnt
  3. Zodra [ASr] verschijnt, houdt u de UP-[ ^ ]-knop ingedrukt; u kunt drie waarden zien:

    a. 10.5 = 11 lbs
    b. 10.6 = 22 lbs
    c. 10.7 = 33 lbs

  4. Voltooi de resetprocedure door de DOWN-knop ingedrukt te houden totdat uw sta-bureau iets zakt en weer omhooggaat.
Mijn afstandsbediening toont een foutcode op het display? Wat moet ik doen?

We hebben enkele stappen voor probleemoplossing als u een van de volgende foutcodes ziet op onderstellen met besturingskasten uit de FLTCON-serie:

Controleer de foutcode hier.

Als het probleem na deze stappen aanhoudt, neem dan gerust contact op met onze technische productingenieurs via 1-800-676-6123, of stuur ons een e-mail op sales@progressiveautomations.com.