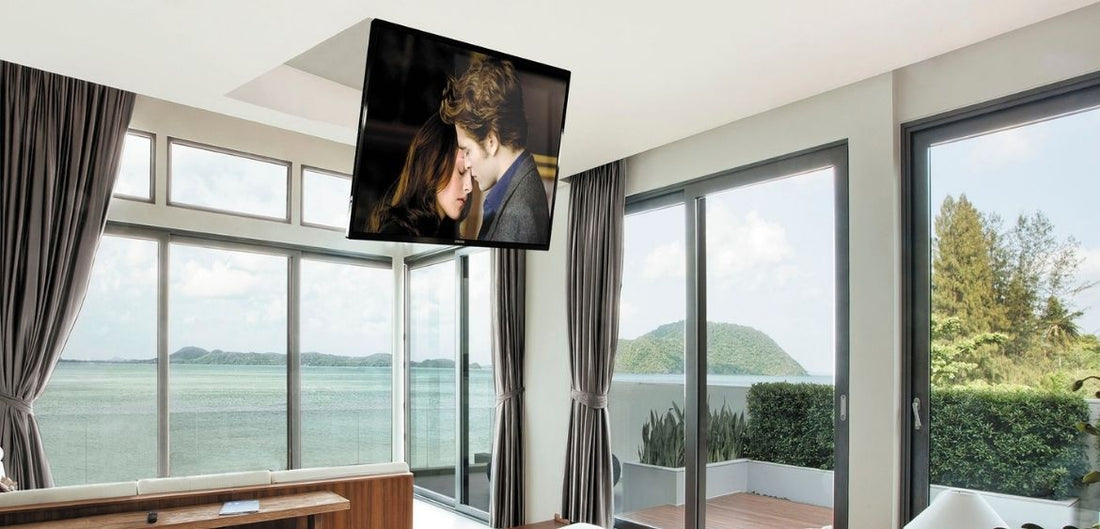
Motorized television systems have existed for a long time, but people perceive them as an expensive system that requires specific skills to install. The invention of do-it-yourself technology has provided inexpensive options for using an electric process that facilitate quick movements. With a broad range of do-it-yourself electronics constructing a drop-down TV lifts are available in many places. Space is one of the biggest problems within many houses; many people have benefited from these options by saving the much-needed space especially at home. Drop-down lifts are not only used where storage becomes an issue, but it can also be used to add some luxury to your home. TV lift systems provide luxury because the TV is positioned in an open space without disrupting other equipment.

TV lifts facilitate easy movement, especially for large TV screens, such technology is appropriate because they do not consume a lot of space. Lift systems can transform your house into a TV, theater without much effort; it lowers TV screens within the required range using an automated control system. TV lifts save enormous spaces at home or can simply be used for entertainment purposes. This system is what you need for your home.
What do you need for drop down TV Lift
Designing TV lifts that can be attached to any TV size is a simple process that requires various items like linear actuator, mount bracket, P2 ceiling cover brackets, a TV support arm, countersunk screw, M5 x 12 nuts, a flat washer M5. Other important tools are: nut M8, A Hex Bolt M8 x 18, flat washer M8, clevis pin, cotter pin, 4 M6 x 25 bolts, washers for the smaller holes and M 10 x 25 bolts. Other important items include the switch box, control box. A full list of required items are below:


Installation process
Several other lift systems can be easily installed within the home to facilitate easy movement of equipment. For Drop down TV, the initial process of installing the lift requires identifying an appropriate position where the TV is to be fixed. A good space should have about 10-inch space in the ceiling to facilitate smooth movement. It is important to place the brackets on a solid background that would firmly hold the screen in the exact location. The next step is to mount the TV mounting bracket using the M8 x 12 countersunk screws behind the TV screen. Mounting requires tightening the nuts to secure the installation. Ensure that the supplied screws fit within the holes.

After attaching the mounting plate, the next process is to connect to the lift system. Attach the support arms using the four M8 x 12 bolts, nuts, and washers. You can either use 30", or the 36" TV support arm can be mounted depending on the type of TV to be installed, then tighten the screws.

The next step is to attach the ceiling cover to the cover brackets using the four M5 X 12 screws, the washer, and nuts and tighten the screws. Ensure to fix the lift for it to move up and down for it to operate properly with the screw provided. The long arms of the brackets need to be attached to the back of the TV screen using appropriate screws within the provided holes. It is important to ensure that the screws are well fastened to avoid any accidents.

The final step needs two people, using M6X25 bolts and washers for the smaller holes and 2 M10 x 25 bolts and washers for the holes in the middle, mount the support column that has been assembled to the track linear actuator. A linear actuator is an electronic system attached to the worm drive and a track used to facilitate the bracket movements. Actuators help in conveyance because they contain a built –in limit switches that make installation easier.

Both the mounting bracket and the TV bracket provide easy lifting process, the brackets located at the back of the TV should be fitted within the two brackets to facilitate movements. The mounting bracket and the TV bracket are important because they are used to attach the column required to lift the TV into the space that is above the ceiling.

The final installation process is to fasten all the cables and secures the wires properly for the TV movement to be smooth and movement should not be disrupted by any item. Installation requires an actuator, switch box, control box, and RF receiver; all these parts use remote controls. The final process is to program the remote control that would operate the lift system. After the final process of installation, test the equipment to ensure that it moves up and down and ensure that all screws and nuts are tightened. Once everything is in place, press the remote button to get a clear view of your television. Dropdown TV systems are suitable for watching movies because of its luxury and spaciousness. The TV system is easy to install and is available in many homes and even social places like restaurants.
How to Control TV Lift Mechanism
Most TV lifts are remote-controlled, therefore before using the wireless remote control box, it is important to program the system, press the button on the control box. To control the TV lift system present the reset button and hold, while holding press the up or down button once. Release the reset button, and the control will be ready to be used.

Before using the remote control, ensure that there are no items obstructing the path where the TV lift will drop. After programming the control system, the wireless remote control system can also be used for non-momentary operation by pressing the buttons once to facilitate the frequent movements. To facilitate the down movement, press the down button once and then press the down or up button to stop the movement. If you prefer momentary control, optional rocker switches provide easy movement. Installing an optional rocker switch is easy, you simply plug the optional rocker into the control box and hold on the rocker switch to facilitate the up and down movement. The procedure is optional is not important to install it is an optional procedure. The bottom or wood panel enables the brackets used for lifting process up from the ceiling that are attached to the TV system which can be adjusted to any position. Actuators have created an inexpensive automated process; TV lifts are currently available several places used like homes, entertainment spots, you can use the system anywhere because linear actuators help facilitate the movement of TV to an appropriate level within the suitable viewing range.